Urban Suburban Mommy

  • The Struggle is Real
  • Domestic Goodness
    • DIY
    • Delicious Dishes
  • Urban Suburban Mommy
    • The Best You
    • Urban Suburban Daddy
    • Mommy Approved
      • Sponsored Post
  • Bon Voyage
  • Fame & Fam
  • 10 Questions
  • FML Mommy
  • About
    • Contributors
    • Contact us
    • Home
    • Write for us
    • Work With Us
  • Elisa Krovblit Keay

Category Archives: Domestic Goodness

Barbecued ginger salmon

Posted on March 22, 2016 by urbansuburbanmommy Posted in Delicious Dishes .

barbecued ginger salmon My boys love fish. Actually, if I ask my 7 year old what he wants for dinner, he’ll usually say “sea creatures.” I think he’s secretly holding out for blowfish, but he’ll try any type of seafood, and he’s open to most any flavours when it comes to fish. I was at the market and they had the most beautiful bright pink organic Irish salmon – I had to grab a few fillets for dinner.

Needless to say, my boy was thrilled. He insisted on cutting the lemon.

I wasn’t sure how I wanted to prepare it when I was at the market. Dill. Blood orange juice. Lime and lemongrass. Honey and soy – salmon is so versatile. But when I got home I had a ginger craving, and my kids love ginger. (My husband, not so much. Actually, he’s not into fish at all. I picked up a thick, juicy rib steak for him when I was at the market.)

What you need:

-salmon fillets
-salt
-cracked pepper
-powdered ginger
-fresh lemon, sliced into thin circles
-2-3 tablespoons melted butter

(and a rib steak for the husband, prepared like this)

What you do:

Brush a light coat of melted butter over the fillets (you can also use olive oil). Salt and pepper them to taste. Dust them with ginger. I use a fair bit, we love the strong flavour of ginger, but if you want to go mild, it’s great as a hint of ginger too.

barbecued salmon on plateHeat the barbecue. Drop the temperature to medium and put the fillets on, skin side down. Layer lemons on top of the fish. Close the lid and grill 5 to 10 minutes, depending on the thickness of the fillets. Flip so that the fillet is sitting skin side up, but atop the lemon slices for another 5 to 10 minutes. My fillets were very thick so I went closer to 10. The lemons will char but the fish will stay juicy and tender. Fish should be very flakey, cooked through.

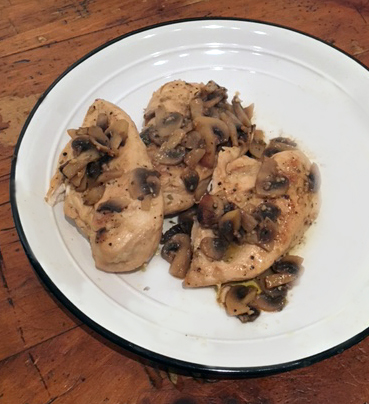
This one is great with sauteed mushrooms, French green beans or a zesty vinaigrette salad. If you’ve got leftovers, ginger salmon is great cold, tossed with greens.

Enjoy!


Tags: barbecue, bbq salmon, delicious, featuredxx, fish, ginger, grill, lemon, market, nom, recipe, salmon, steak .

Beefy Irish Stew

Posted on March 15, 2016 by urbansuburbanmommy Posted in Delicious Dishes .

irish beef stewWith St. Patrick’s day this Thursday, I thought a little Irish love was in order for #TastyTuesday! Irish Stew is kind of obvious, and I was going to dig deeper, but the Urban Hubby is of Irish descent, and is the definition of a meat-n-potato-loving man, so my Beefy Irish Stew is the real deal (he hates lamb, but feel free to swap it in for a more authentic version.)

Get it going and let it simmer until it’s so thick you can stick a fork in it and it.

What you need:

-2 pounds beef, cubed
-3 large potatoes, coarsely cubed
-3 carrots, chopped
-1 parsnip, chopped
-2 large Spanish or white onions, coarsely chopped
-3 tablespoons vegetable oil
-1 cup flour
-1 can of Guinness beer (or dark ale)
-1 cup beef stock (bouillon)
-4 cloves minced garlic
-5 whole bay leaves
-1 tablespoon thyme
-1 tablespoons rosemary
-2 tablespoons chopped parsley
-cracked pepper to taste
-2.5 tablespoons of salt

What you do:

Toss the cubed beef in flour to coat. In a large stock pot, heat the oil, throw in in the bay leaves. Turn up the heat and sear the beef on all sides. Ideally all sides should be crusted. Turn the mixture down to mediu and add garlic and onions, sautéeing and caramelizing the onions. Add the thyme and rosemary as well as three tablespoons of flour. Muddle everything together. Once combined, add the Guinness and the beef stock. Let this simmer and thicken, about 10 minutes. Throw in the rest of the ingredients, cover and let simmer a few hours until the veggies are tender, stirring gently. You can also throw it in a slow cooker for the day or into a dutch oven and into the oven at 300° for a few hours.

Serve it steaming hot in a big bowl with some crusty bread for sopping up the stew. This hearty dish needs no accompaniment – except maybe a pint of your favourite Irish ale.

Tags: featuredxx, hearty, Irish Stew, St. Patrick's Day, TastyTuesday .

Easy DIY gallery wall for a kid’s bedroom

Posted on March 11, 2016 by kasiawdesigns Posted in DIY .

My daughter Izzie turned three in September and it was time to say goodbye to the crib and give her a big girl room. A fun DIY that I did in her space was create a gallery wall.


Izzies Room - Gallery Wall 2

The first thing I did was gather up some frames. Some I purchased, others I already had around the house that I wasn’t using. The frames I had at home weren’t exactly the right colour, but that was not a problem. I painted them out using the teal and coral tones to match the ones I introduced in her room decor, and instantly the frames got new life.

I chose images that my 3 year old relates to and loves: ice cream, cupcakes, ferris wheel, balloons, ballet; and I printed them on heavier stock. All the images contain some of the colours that are in her space to help create harmony and a cohesive look. I grounded the centre of the wall by using the IKEA Ung Drill frame, which I painted grey to pick up on her drapes and rug.

I wanted to create some dimension on the wall so I mounted a faux doe head with silver antlers and added a whimsy touch by placing a coral petunia behind the antler. This breaks up the square art and really creates a centre focal point for the wall. I finished off the gallery wall by placing random silver and gold decal dots which add a playful touch.

Paint used for the frames: Latex Pearl, rolled on with a foam roller (3 coats)

Paint for the Ung Drill Frame: Rustoleum spray paint (use outdoors in a well ventilated area)

Gold/Silver Decals: Muse Signs

Kasia Waloszczyk DESIGNS - HeadShot

Kasia Waloszczyk ,an accredited Interior Stylist/Decorator, also runs her own design company, Kasia Waloszczyk DESIGNS, a savvy and trendy décor service that caters to clients in the Greater Toronto Area. As a colour expert, Waloszczyk has held independent seminars on colour and pattern trends.  She has also worked with design firms overseas, developing textile colours, designs, and patterns applicable for the North American market.

Gifted with a keen eye for colours and shades, Kasia Waloszczyk has been applying her colour and design techniques for more than 15 years in the industry. A design expert on CTV’s The Marilyn Denis Show, Waloszczyk’s work has always kept her ahead of design trends and has also given her an in-depth expertise on fabrics for creative custom window treatments and unique upholstery, for both residential and commercial spaces.

KasiaWDesigns.com

twitter@kasiaw_designs

instagram@kasiaw_designs

Tags: big girl room, decals, DIY, doe head, feature wall, featuredxx, frames, IKEA, Kasia Waloszczyk, makeover, playful, Rustoleum, spray paint .

Slow go chicken and mushrooms

Posted on March 8, 2016 by urbansuburbanmommy Posted in Delicious Dishes .
FEATURE Slow go chicken and mushrooms

Slow go chicken and mushroomsOne night I came home extra late from work and Urban Suburban Daddy had made me the most delicious dinner. He was aiming for something similar to Chicken Marsala – but he didn’t realize we had any wine so he improvised. He’s a really good cook – I’m a lucky girl. It’s quick, not too complex and the flavors merge together so beautifully. Enjoy!

What you do:

-4 chicken breasts
-2 cups sliced mushrooms
-salt and pepper
-1/2 cup butter
-3 tablespoons vegetable oil
-2 cloves chopped garlic
-oregano

What you do:

Brown the chicken in vegetable oil over medium heat, turning once, about 15 minutes. Turn heat down to medium-low and add in the rest of the ingredients except for oregano. Cover and let simmer 18-20 minutes, turning occasionally.

Plate and garnish with a sprinkle of oregano. Serve with side of rice – try our Foolproof rice.

Tags: chicken, chicken marsala, dinner, easy chicken dish, flavorful, marsala, mushrooms, nom, recipe .

Transform a playroom with chalkboard paint

Posted on March 2, 2016 by kasiawdesigns Posted in DIY .

Interior Stylist/Decorator Kasia Waloszczyk and Urban Suburban Mommy contributor shares her easy yet impactful D.I.Y. playroom makoever project:

I ended up painting out one of the walls black with chalkboard paint in my daughter’s playroom. The black wall adds drama to the space and gives her a vertical surface to be creative on.

KASIA W - chalkboard paint

While I was painting out the wall I decided to paint out her tabletop as well – it completely transformed it.

The once boring IKEA Chidlren’s Table (Sundvik) became the showpiece of the room. I sanded the top completely, and gave it a quick coat of latex primer. Once that dried I painted it out using the Rustoleum black chalkboard paint – it has held up wonderfully and is easy to keep clean.

I decided to add a trendy element to the table and also painted out the bottom portion of the legs using silver metallic paint. The dipped legs add a designer feel and completely transform the table.  The IKEA Kritter chairs got a quick makeover as well – I added a blocked monogram decal in black. My daugher’s name, of course: Izabella May Waloszczyk – IMW.

The entire set looks fabulous, but more importantly, customized to her room. And this was just a quick, budget friendly makeover on items I already had.

Kasia Waloszczyk

Kasia Waloszczyk DESIGNS - HeadShot

Urban Suburban Mommy contributor, Kasia Waloszczyk, an accredited Interior Stylist/Decorator, also runs her own design company, Kasia Waloszczyk DESIGNS, a savvy and trendy décor service that caters to clients in the Greater Toronto Area. As a colour expert, Waloszczyk has held independent seminars on colour and pattern trends.  She has also worked with design firms overseas, developing textile colours, designs, and patterns applicable for the North American market.

Gifted with a keen eye for colours and shades, Kasia Waloszczyk has been applying her colour and design techniques for more than 15 years in the industry. A design expert on CTV’s The Marilyn Denis Show, Waloszczyk’s work has always kept her ahead of design trends and has also given her an in-depth expertise on fabrics for creative custom window treatments and unique upholstery, for both residential and commercial spaces.

KasiaWDesigns.com

twitter@kasiaw_designs

instagram@kasiaw_designs

For more information on Kasia Waloszczyk, visit www.KasiaWDesigns.com. Follow Kasia on Twitter and stay up-to-date with her work on Instagram, @kasiaw_designs

Tags: budget friendly, chalkboard paint, creative, DIY, IKEA, Kasia Waloszczyk, monogram, playroom .

Nana Helen’s potato soup

Posted on March 1, 2016 by urbansuburbanmommy Posted in Delicious Dishes .
feature nana hellen potato soup

This is one of my favourite recipes – it brings back some of my best memories, along with being one of the most delicious soups ever. You know that go-to comfort food that always warms you from the inside out and makes you feel like everything will be okay? Yah, this is it for me.

My Nana Helen was an amazing woman. Her Polish family sure could make magic with very few ingredients. In fact, the only ‘spices’ in her cabinet were salt, pepper and garlic powder, and yet she was quite a good cook. I miss my Nana and I’m glad I learned a few of her recipes, so this one’s for you, Nana Helen.

I’m going to share this recipe with you, and then go enjoy a nice big bowl of this myself – I hope you will too.

nana hellen potato soupWhat you need:

-6 large potatoes, peeled and cubed into roughly 1/4-inch squares
-1 large onion, diced
-1/2 – 3/4 cup flour
-4 tablespoons butter
-salt and pepper
-pot of water

What you do:

Dice the onion and start sautéeing it in the butter over medium heat in your soup pot. You want to go past caramelizing it and almost to black. This will give the soup a hearty flavour and an even colour as you don’t use a stock for the base.

Once the onion is deeply browned – just shy of burned – start sprinkling flour into the butter, like creating a roux. Keep mixing. A good roux isn’t hard to make, it’s close to equal parts of flour and fat, and at that sweet spot of the perfect balance it’s sort of like a paste. Just keep adding flour and blending into the butter/onion mixture until you think the oil cannot absorb one more bit of flour.

This roux/paste will burn quickly so don’t putz around with it too much. Have the water on hand and start adding it by the cup, stirring constantly. You want the water and the roux to blend well. You can add a bit more flour at this point, and then keep stirring. I like to see it on the thick side.

While mixing in the water you’re also deglazing the bottom of the soup pot from all of that lovely fried onion residue. That’s the flavour!

Once the roux is fully liquified, fill the pot with the diced potatoes, throw in about 2-3 tablespoons of salt and some pepper, to taste. The starch from the potatoes will also help to thicken the soup.

Now let the soup simmer. It can be served as soon as the potatoes are nice and soft – or leave it on your stove to boil down and become even more flavourful within the next day or two.

It’s a bit thick and can get a bit dark, depending on the darkness of the sautéed onion. If you boil too much water off, just top up the pot with more and let boil.

MMMMMMM

Tags: comfort food, easy potato soup recipe, featuredxx, flavour, garlic, nom, onion, Polish, potato soup, recipe, roux, soup .

A lesson in food with Registered Dietitian Abbey Sharp

Posted on February 26, 2016 by urbansuburbanmommy Posted in Domestic Goodness, Fame & Fam .

Food writer, blogger and Registered Dietitian, we caught up with the ever-so-chic Abbey Sharp to ask her the questions you know you want to know about what we really should be eating.

What are super foods? 

I think they’re foods that some marketer or self professed “nutrition expert” decided instantly makes a dish healthy.

It’s a buzz word. It’s a health halo. It’s unfortunately not real.

No one food has the ability to promote good health, or bad health. And even these so-called super foods can appear in dishes that aren’t otherwise well balanced. Wild blueberry donuts are still deep fried sugar bombs. I think we need to stop labeling foods in general, but the term super food is one you won’t generally hear me use.

What 5 foods should every household have as nutritious staples?

I don’t think there are 5 universal foods for everyone, because we all have different likes, cultural practices and dietary needs. But some of my go to staples are : canned or dried beans and legumes, balsamic (or another flavourful) vinegar, plain Greek yogurt, oats, eggs.

STUDIO-13

Abbey Sharp

 So many women – especially moms – struggle with losing weight. Any advice on what to do and what not to do?

My first suggestion is to look at your motivation. Why do you want to lose weight? Most people would suggest that they want to live longer, be stronger, reduce the risk of disease and live a healthier life.

Well, you can do all of that without the scale ever budging.

Healthy eating and activity can promote health at any size. You may lose weight if you start to be more active, or if you start to eat a little more fresh produce, but the key to long term success is to change the goal to health, not weight loss.

Research also tells us that dieting doesn’t work. When we restrict our intake, we tend to feel so deprived that the moment we have access to some sort of “forbidden” food, we binge, we feel guilty, then we start the restriction cycle all over again – but even more stringently. The key is to just not get started down that path in the first place. Rather than focusing on restricting, I recommend a technique called mindful eating. It involves listening to your body and nourishing it as it needs. ABBEY-10There’s no depriving, there’s no moral weight assigned to foods – or you for eating those foods. You just eat what you want, start when you’re hungry and stop when you’re full.

If the thought of letting go of the control scares you and you’re convinced you’ll just go crazy and gain a bunch of weight, keep in mind that as soon as you give yourself permission to eat without guilt or fear of future denial, the desire to go overboard on any food will disappear and you will just focus on eating to feel strong, nourished and satisfied. Research tells us, mindful eating and having a healthy relationship with food is the secret to long term success.

When a mom is shopping at the grocery store, what ingredients should she be concerned about when buying food for her family?

When reading nutrition labels and comparing like products, I would aim to choose those with higher amounts of protein and fibre, and lower amounts of salt and sugar. Also, don’t be lured in by claims on the front of packages – they are technically true, but there are a lot of tricks that marketers use to make their product seem healthier than it may be. The back of the package has the facts, so always reference that.

As for ingredients, I would stay away from hydrogenated oils altogether, and try to limit an excess of added sugars, which can be identified by the suffix “ose” (sucrose, fructose, maltose etc.). Ideally, look for products with relatively short ingredient lists. For example, I would rather buy plain yogurt where the only ingredients are milk, and maybe some probiotics and added nutrients and where I had the option to add my own fruit or sugar, than a flavoured yogurt that has sugar, colours and other stabilizers. There are exceptions, and there is no question that some added ingredients can make getting dinner on the table easier and more likely, but when time permits, go simple and build from there.

What is your favourite part about being a Registered Dietician?

Well, I’m definitely a different breed of RD. I work only in media, so I do a lot of TV and writing, which I love. My favourite part of my job is definitely communicating nutrition to the masses in my YouTube channel and on TV, trying to make it fun, and hopefully debunking the myths out there perpetuated by unqualified “nutrition experts”. Healthy eating doesn’t have to be as complicated as the media tries to make it. Listen to your body, move your body, nourish your body and do what feels good.

ABBEY-STUDIO-1

Abbey Sharp is a Registered Dietitian (RD), avid food writer and blogger, TV and radio personality, food brand spokesperson, recipe developer, YouTuber, and the founder of Abbey’s Kitchen Inc. Abbey believes that a pleasurable relationship with food is inherently essential for good health and shares this unique philosophy through her regular contributions to The Marilyn Denis Show (CTV), Best Health Magazine, and countless other media outlets and publications. Abbey has worked as a celebrity Brand Ambassador and Spokesperson for dozens of popular food, health and lifestyle brands such as Electrolux, Frigidaire, Almond Board of California, Jamieson Vitamins, Labatt, Sunkist Citrus, and Panasonic. She is also often touted as the go-to personality for hosting popular food activations including Toronto’s Food & Wine and Taste of Toronto. Today you can catch Abbey’s cheeky approach to food and nutrition on her popular food blog, and Tastemade YouTube channel, Abbey’s Kitchen.

twitter@AbbeysKitchen

Tags: Abbey Sharp, Abbey's Kitchen, Diet, featuredxx, food, health, ingredients, Nutrition, Super foods, Weight Loss .

Oooey gooey chewy chocolate chip cookies

Posted on February 23, 2016 by urbansuburbanmommy Posted in Delicious Dishes .

For years my cookies were light and fluffy – and either undercooked or crunchy. Every time I’d try someone else’s soft little flat cookies I’d die a little inside. That’s all I wanted from my chocolate chip cookie – maybe a little flat, maybe a little crispy around the edges.

oooey gooey chewy chocolate chip cookies

Then I discovered that it was time to step away from the stand mixer and get into it by hand. Yup, good old fashioned hand mixing with a spatula. Turns out I had a serious case of overmixing. The secret to soft, flat melt-in-yer-mouth, ohhhhhh-so-good, oooey, gooey, chewy chocolate chip cookies is no electric beating and minimal cooking time.

What you need:

-2 1/2 cups of unbleached all purpose flour
–1 teaspoon of baking soda
-big pinch of salt
-1 cup unsalted butter, room temperature
-1 cup packed brown or golden sugar
-1 cup white sugar
-1 tablespoon of vanilla extract
-2 eggs
-2 cups semisweet or milk chocolate chips

What you do:

Preheat oven to 350°. Mix flour, baking soda, baking powder and salt together in a bowl and set aside. Put the room-temperature soft butter in a bow and mush it around with your spatula. Now add sugars and keep mixing. add vanilla and eggs and again, keep mixing and mushing. You want it to be well mixed – but you’ll still see little lumps of butter. By the time you’re done mixing they’re the size of coarse bread crumbs in your mixture. Now add the dry ingredients and mix until the dough comes together. Throw in the chocolate chips and give a final mixing until everything is even.

Drop one-inch balls onto an ungreased cookie sheet and keep them about an inch and a half apart.

Bake for 11-13 minutes, making sure to take them out just as they brown. If you’re a fan of crunchy, let them cook a little longer and the edges will crisp up.

These won’t rise. They may be a bit puffy, but basically flat. And gooey. And delicious. Grab a glass of milk and enjoy some before the kids eat every last one, you deserve it.

And, just so you get your cookies to your version of perfection, LifeHacker.com has this handy dandy chart for tweaking your cookie recipe to your personal preference:

LifeHacker.com: Know what to tweak to get the best chocolate chip cookies

LifeHacker.com: Know what to tweak to get the best chocolate chip cookies


Tags: chocolate chip, cookies, delicious, gooey, ingredients, kid-approved, nom, recipe .

Kid vs. Adult Space with Designer Kasia Waloszczyk

Posted on February 18, 2016 by urbansuburbanmommy Posted in DIY .

I thought by finishing our basement that I would have solved the problem of our living room being overrun by toys.  It was a brief solution, until kid #2 came along.  We spoke to designer, TV personality and fellow mom Kasia Waloszczyk who shared her insight and inspiration to find a happy medium between toys and grown up things.

The Dual Purpose Living Room – Playroom & Adult Space

Urban Suburban Mommy - Living Room Storage-page-001

1.If you don’t have the luxury of a bonus room or basement in your home – how can your living room serve a dual purpose as playroom and adult space.

Buy furniture pieces that not only suit your lifestyle but also serve a dual/triple purpose.  There are lots of growing families who are choosing to live in smaller spaces.   Luckily, retailers have picked up on this trend and offer tons of multi-purpose furniture piece options.

Dual purpose furniture/products can be easily found and for affordable prices.  Ikea has a great sofa that not only serves as a couch + pullout sleeper but also has a built in storage unit that can house ample toys, blankets, pillows etc (FRIHETEN)  — Its all about staying organized and having a designated space for everything.

2. How do you avoid your living room from being overrun by toys?

The first thing you have to do is ask yourself if your child needs all the toys that are in your living room, does he or she play with every single one?  If at the end of the day you are over flowing with toys, perhaps you have too many?  Scale back, pack some away and re-introduce them in a month or so, but only after taking away a toy in its place.  Rotating your toys will give your child something new to play with, plus it will leave your space clutter free.  This method will help with staying organized.

3. Do you have any storage or organizational solutions for toys or adult things?

When it comes to storage, think outside the box.  My “go-to” storage is a budget-friendly garbage can from Ikea (KNODD) – it resembles Oscar the Grouch’s  garbage can which makes it fun for kids.  Get two or three of the same can, and fill it with toys, best of all it has a lid.  So, at the end of the day when it’s time for the adults to unwind, the toys are completely out of site.  I also love storage cubes, placing two of them across from your couch offers additional seating, you can optimize the storage inside the cube, plus some of them cube lids even turn into serving trays. Urban Barn has a really nice one that I often use for clients (Fay Ottoman – Charcoal).  Lastly, opt for a proper TV/media unit – you can customize one at Ikea for a great price.  Looks for something that offers you plenty of drawers as well as shelving units with doors (doors are fantastic as they hide the clutter).  Remember to utilize your vertical and horizontal space when creating your storage.

4. How do you make a living room safe for kids?

Mount and secure everything to the wall.  TVs should always be out of reach for children. Have a bookcase or TV bench – mount them too!  Also, avoid furniture that is delicate or has sharp corners such as glass coffee tables.  Although stylish, kids leave lots of fingerprints on glass coffee tables.  Instead, choose a coffee table with multiple storage, for toys and blankets.  Some coffee tables can even open up to provide a laptop/dinner tray. West Elm has a great one. Their Industrial Storage Coffee Table is on the pricier side but is multi-purpose, so it is money well spent.   Make sure your living room incorporates a soft play surface – you don’t have to use the foam kids mats.  I suggest going for a nice plush rug instead, which will provide a comfy surface for your child but also work to complete and ground your adult space too.

5. What design features or accessories do you recommend that would work for both an adult and kids space?

I love art!  It works beautifully for both.  You can create a photo gallery wall that will be appreciated by both kids and adults.  Work with different sized frames or buy multiples of the same piece of art.  To create a cohesive look, choose a photo filter such as black and white – and apply it to all the pictures that you will be displaying.  By doing this, you can create a more formal and harmonized feel.

6. What colours work best for a multifunctional living room?

Colours are very personal and unique to each space.  Having worked for Benjamin Moore for over 12 years, I know first hand that a color can look amazing in one space, and completely the opposite in another.  I would suggest sticking with more neutral tones; warm greys, soothing blues, different shades of off whites – this will help to create a calming and relaxing atmosphere.  If you want to inject pattern to the space, add some wallpaper with a tone-on-tone look for that elevated sophistication.  Bring in your bold color through accessories, decorative pillows, vases, throws or decorative objects.

Kasia Waloszczyk

Kasia Waloszczyk DESIGNS - HeadShot

Kasia Waloszczyk, an accredited Interior Stylist/Decorator, also runs her own design company, Kasia Waloszczyk DESIGNS, a savvy and trendy décor service that caters to clients in the Greater Toronto Area. As a colour expert, Waloszczyk has held independent seminars on colour and pattern trends.  She has also worked with design firms overseas, developing textile colours, designs, and patterns applicable for the North American market.

Gifted with a keen eye for colours and shades, Kasia Waloszczyk has been applying her colour and design techniques for more than 15 years in the industry. A design expert on CTV’s The Marilyn Denis Show, Waloszczyk’s work has always kept her ahead of design trends and has also given her an in-depth expertise on fabrics for creative custom window treatments and unique upholstery, for both residential and commercial spaces.

KasiaWDesigns.com

twitter@kasiaw_designs

instagram@kasiaw_designs


Tags: Adult Space, Benjamin Moore, Decor, Design, DIY, featuredxx, IKEA, Kasia Waloszczyk, Kid Space, makeover, Transformation .

Baked butternut zig zag blackbean taquitos

Posted on February 16, 2016 by urbansuburbanmommy Posted in Delicious Dishes .

My kids devoured these – and a fair amount of sour cream too. This makes A LOT and they are good for lunch the next day. If you use larger tortillas (which I did the first time) hubs dubbed them “man-sized” taquitos

taquitos

What you need:

-1/2 bag of butternut zig zags (pick up a bag at SAM’s Club) or use good ol Butternut Squash strips/cubes
-1 can black beans, rinsed, drained
-1 cup of corn kernels
-1 cup old cheddar cheese, shredded
-4 ounces melted cream cheese
-2/3 cup salsa – go with the spice your kids can handle
-1 teaspoon chili powder
-1/2 teaspoon ground cumin
-salt & pepper, to taste
-flour tortillas (small or “man-sized”)
-1 tablespoon butter, 1 tablespoon olive oil, melted togehter
Garnish for serving: sour cream, guacamole, hot sauce

What you do:

Preheat oven to 375°. Grab a bowl and mix the butternut zig zags, beans and corn. Add the cheese and mix together. In a second bowl stir together melted cream cheese, salsa, spices, salt & pepper. Mix both bowls together.

Scoop up the mix and form a line about an inch wide in the lower half of the tortilla. Rolle the tortilla tightly and place seam down on a lightly greased baking sheet. Brush taquitos with the oil/butter mixture. Bake until golden brown, about 15 minutes.

Serve with sour cream, guacamole and/or hot sauce.

Tags: butternut squash, Butternut Zig Zags, kid-approved, Mexican recipe, nom, recipe, Sam's Club, taquitos .

The beet chip massacre

Posted on February 9, 2016 by urbansuburbanmommy Posted in Delicious Dishes .

I love making kale chips, veggie chips – root chips are the best. So when I saw this picture in my Facebook feed, I had to ask my friend Nicole, from Lincoln, California, for the recipe.

facebook beet chips

Beet chips are delicious, good for you, and a whole lot of mess to leave and scare the pants off of the rest of the family!

What you need:

-Beets

What you do:

Nicole says:

No seasoning but I did learn – PEEL THEM.

Literally all I did was slice them (implement of destruction obvious) thin, and because my oven has a dehydrate option stuck them in the oven till they were crispy (turning about 1/2 way through). They can be made in a dehydrator too – will probably just take longer than 30ish minutes per side.

You can also make them in the oven. I have seen recipes that call for 375° for15 to 20 minutes. You have to watch them carefully so they crisp and don’t burn.

beet chips

photo: star5112


Tags: beet chip, beets, delicious, featuredxx, Mommy Approved, nom, oven baked beets, recipe .
« Previous Page
Next Page »

Stay Social: Urban Suburban Mommy

Instagram

Facebook

Urban Suburban Mommy

Featured on:

Take a look

  • 10 Questions With
  • Bon Voyage
  • Delicious Dishes
  • DIY
  • Domestic Goodness
  • Fame & Fam
  • FML Mommy
  • Inspiration
  • Mommy Approved
  • Sponsored Post
  • The Best You
  • The Struggle is Real
  • Urban Suburban Daddy
  • Urban Suburban Mommy

Nav

  • The Struggle is Real
  • Domestic Goodness
    • DIY
    • Delicious Dishes
  • Urban Suburban Mommy
    • The Best You
    • Urban Suburban Daddy
    • Mommy Approved
      • Sponsored Post
  • Bon Voyage
  • Fame & Fam
  • 10 Questions
  • FML Mommy
  • About
    • Contributors
    • Contact us
    • Home
    • Write for us
    • Work With Us
  • Elisa Krovblit Keay

40 is the new baby

You're 40-ish and have a young family. We get you - we're there too.

Pages

  • About
    • Contributors
      • Alexis Nicols
      • Alissia Marciano
      • Clara Power
      • Danielle Reid
      • Erica Wearing
      • Kasia Waloszczyk
      • Kate Nash
      • Krista Holmes
      • Lauren Millman
      • Sara Duck
    • Elisa Keay
    • Work With Us
    • Write for us
  • About us
  • Cart
  • Checkout
  • Coming soon
  • Contact us
  • Elisa Krovblit Keay
  • Fullwidth page
  • My Account
  • Shop

Archives

  • May 2023
  • July 2022
  • November 2020
  • November 2019
  • July 2019
  • October 2018
  • August 2018
  • July 2018
  • January 2018
  • December 2017
  • November 2017
  • October 2017
  • September 2017
  • August 2017
  • July 2017
  • June 2017
  • May 2017
  • April 2017
  • March 2017
  • February 2017
  • January 2017
  • December 2016
  • November 2016
  • October 2016
  • September 2016
  • August 2016
  • July 2016
  • June 2016
  • May 2016
  • April 2016
  • March 2016
  • February 2016
  • January 2016
  • December 2015
  • November 2015
  • October 2015
  • September 2015

Categories

  • 10 Questions With (27)
  • Bon Voyage (20)
  • Domestic Goodness (89)
    • Delicious Dishes (77)
    • DIY (9)
  • Fame & Fam (14)
  • FML Mommy (7)
  • Inspiration (1)
  • Mommy Approved (48)
    • Sponsored Post (5)
  • The Best You (44)
  • The Struggle is Real (94)
  • Urban Suburban Mommy (56)
    • Urban Suburban Daddy (7)

WordPress

  • Register
  • Log in
  • WordPress

CyberChimps WordPress Themes

© Urban Suburban MOmmy
Never Miss A Post

Stay Connected